Hi ... I'm back with a brand new image from Just Some Lines.
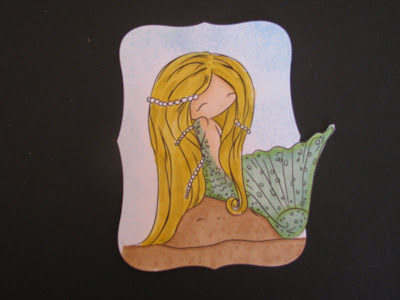
She's called Emo Mermaid and I think she is adorable!
I added a little bling down in the corner and a great sentiment and this wonderful wooden seahorse that I found (I really wanted some sort of crab - like Sebastian! - but had to make the sea horse work because I couldn't find a crab)
For this card I also use a Nestability (Labels #8) by Spellbinders. I love using these for cutting out my images to give them a different look.
Today I have a tutorial to share with you on another creative way to use your "Nesties".....
First you want to color your image ... (I colored mine with copics and sponged the water with Palette's Reflection blue ink)
Then look at what shape and what "nestie" that you want to use ... I choose Labels #8
Now I know what you are saying ... WAIT!!! DON'T CUT OFF HER TAIL!!!! ... no worries ... that is what this tutorial is all about!
So I come in from the side ans just trim AROUND her tail and above her tail ...
Then I come in with my "nestie" again and with the cutting blade part down thread the tail OVER the nestie die.
I place this on my cutting plate and sandwich it in my Sizzix (you could also use a Cuttlebug or other die cut machine)
Here is what it looks like after it comes out of the die cut machine.
Here she is ... after this I sponged the edges more with the Palette Reflection Blue ink ... And she is all ready for placement onto my card.
Here is the final card again!
ENJOY!
and thanks for stopping by....
and thanks for stopping by....


WOWZERS this is awesome! Never would have thought to do that! Your so creative!
ReplyDeleteAdorable card, Chelsea!!! Thanks for sharing :)
ReplyDeleteI love that technique - but never can do it successfully. Thanks for the inspiration to try again!
ReplyDelete